How to Change Your Brake Pads 2026 Guide
How to change your brake pads is one of the most searched DIY car maintenance questions, and for good reason. Worn brake pads reduce stopping power, increase braking distance, and can damage rotors if ignored. The good news is that in 2026, changing brake pads is manageable if you follow correct steps, use the right tools, and know when DIY is safe versus when professional help is the smarter option. Here is a fact many drivers overlook. The U.S. National Highway Traffic Safety Administration (NHTSA) highlights that brake related issues remain a leading contributor to vehicle safety risks when maintenance is delayed. In hot, stop and go driving environments like Dubai, brake pads can wear faster due to heat, traffic congestion, and frequent braking. At Caroto Repair Dubai, we see this daily, squealing brakes, grinding noises, and reduced braking response caused by worn pads or incorrect installation.
What Does Changing Brake Pads Involve?
Ever heard a sharp squeal at a traffic light and wondered if it is serious? We hear that concern every day at Caroto Repair Dubai. Changing brake pads is one of the most important safety maintenance tasks, especially with Dubai traffic, heat, and frequent stop and go driving. Simply put, brake pad replacement means removing worn friction material and installing new pads so your car can stop safely and consistently.
Below is exactly what that involves and how often you should expect to do it.
What Brake Pads Do and Why They Wear Out
Brake pads press against the brake rotors to slow and stop your car. Every time you brake, friction is created and that friction gradually wears the pads down. In Dubai conditions, wear can happen faster due to heat and heavy city driving.
Brake pads wear out faster because of:
Frequent braking in traffic
High temperatures that increase friction
Driving habits like hard or late braking
According to the U.S. National Highway Traffic Safety Administration, worn brake components significantly increase stopping distance and accident risk if not replaced on time. At Caroto Repair Dubai, we inspect pads during every brake service to prevent rotor damage and unsafe driving.
How Often Brake Pads Need Replacement
So how often should you replace brake pads? In real world Dubai driving, most cars need new brake pads every 30,000 to 50,000 km, though this varies by vehicle type and driving style. Factors that affect replacement intervals include:
City driving vs highway driving
Vehicle weight, SUVs and 4x4s wear pads faster
Pad material, ceramic vs semi metallic
We always recommend brake inspections every 10,000 km to catch wear early. For additional safety guidance, the NHTSA advises regular brake inspections as part of routine vehicle maintenance. Knowing what brake pads do and when they wear out helps you decide when DIY replacement is safe and when professional brake service is the smarter choice.
Should You Change Brake Pads Yourself or Visit a Workshop?
This is one of the most honest questions we hear at Caroto Repair Dubai. Many drivers want to save money, but brakes are a safety critical system. The right choice depends on your experience, tools, and your car’s braking setup.
Below is a clear, real world breakdown to help you decide with confidence.
When DIY Brake Pad Replacement Is Safe
DIY brake pad replacement can be safe if all conditions are right.
You can consider DIY when:
You have basic mechanical experience
You own proper tools like jack stands and a torque wrench
Your car has standard front disc brakes
There is no warning light or brake fluid issue
For basic vehicles, changing brake pads at home can be a practical option if done carefully and correctly.
When Professional Brake Service Is the Better Option
Workshop service is the safer choice in many situations.
We recommend professional brake service if:
Your car has rear brakes with an electronic parking brake
You hear grinding, vibration, or pulling while braking
Brake warning lights are on
Rotors or calipers may also need replacement
According to the U.S. National Highway Traffic Safety Administration, improper brake repairs can increase stopping distance and accident risk. At Caroto Repair Dubai, we inspect the full braking system, not just the pads.
DIY vs Workshop Cost Comparison in Dubai
DIY cost: AED 150 to 350 for brake pads only
Workshop service: AED 350 to 800 including inspection and fitting
DIY saves money upfront, but professional service adds safety, diagnostics, and warranty protection.
Tools and Parts You Need Before Changing Brake Pads
Before you lift the car or remove a single bolt, pause for a second. At Caroto Repair Dubai, we often see DIY brake jobs go wrong not because of skill, but because the right tools or parts were missing. Having everything ready first makes the job safer, faster, and far less stressful. Here is a simple checklist you can follow.
Essential Tools for Brake Pad Replacement
These tools are non-negotiable for safety and accuracy:
Jack and jack stands
A hydraulic jack lifts the car
Jack stands are mandatory to support the vehicle safely
Never rely on the jack alone
Torque wrench
Ensures caliper bolts and wheel nuts are tightened to spec
Prevents loose bolts or over-tightening damage
Caliper piston tool or C clamp
Compresses the caliper piston evenly
Reduces risk of piston or seal damage
According to the U.S. National Highway Traffic Safety Administration, improper lifting and unsecured vehicles are a major cause of DIY repair injuries.
Brake Parts and Consumables You Should Have Ready
Brake pads
Always match the correct pad type for your vehicle
Check front vs rear compatibility
Brake grease
Applied to pad backing plates and slide pins
Helps prevent squeal and uneven wear
Brake cleaner
Cleans dust and residue from rotors and calipers
Essential for safe, noise-free braking
We recommend laying all tools and parts out before starting. Up next, we cover a critical safety checklist you must follow before beginning the actual brake pad replacement.
Safety Checklist Before You Start
Before changing brake pads, stop for a moment. At Caroto Repair Dubai, we often see brake issues caused not by bad parts, but by skipped safety steps. Brakes are a safety critical system, and one small mistake can put both you and your car at risk. Follow this checklist carefully before you begin.
Jacking Points and Vehicle Support
Lifting the car safely is the first and most important step. Always make sure to:
Park on a flat, solid surface
Engage the parking brake and use wheel chocks
Lift the car only at manufacturer-approved jacking points
Support the vehicle with jack stands, never the jack alone
According to the U.S. National Highway Traffic Safety Administration, improper vehicle support is a leading cause of injuries during DIY car repairs.
Brake Fluid and Caliper Safety Rules
Brake systems operate under high pressure and need careful handling.
Important rules to follow:
Never let the caliper hang by the brake hose
Support the caliper using a hook or wire
Check brake fluid level before compressing the piston
Do not overfill the brake fluid reservoir
Compressing the caliper piston without monitoring fluid level can cause spills or damage seals. We always inspect hoses, caliper boots, and fluid conditions during brake service to prevent hidden failures.
How to Change Your Brake Pads Step by Step
If you are doing this for the first time, take it slow. At Caroto Repair Dubai, we always tell drivers that careful steps matter more than speed. Follow this sequence exactly and stop if anything feels unsafe.
Step 1: Loosen Lug Nuts and Lift the Car
Before lifting the car, slightly loosen the wheel lug nuts while the car is still on the ground. This prevents the wheel from spinning in the air.
Use a wheel wrench
Do not remove the nuts yet
Lift the car using approved jacking points
Secure the vehicle with jack stands
Safety first. Never work under a car supported only by a jack.
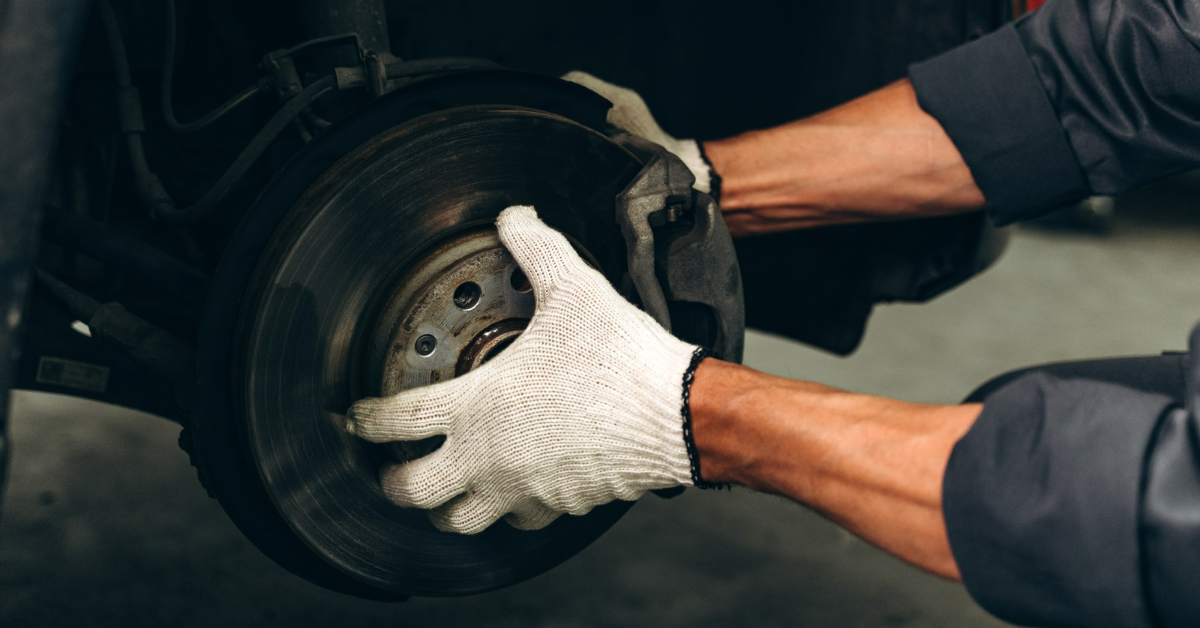
Step 2: Remove the Wheel and Inspect Brake Components
Once the car is safely supported, remove the lug nuts and take off the wheel.
Take a moment to inspect:
Brake pad thickness
Rotor surface for grooves or scoring
Brake hose condition
If the rotor is badly worn or cracked, brake pads alone may not solve the problem.
Step 3: Remove the Caliper Safely
Locate the caliper bolts, usually on the back side of the caliper.
Remove the caliper bolts carefully
Slide the caliper off the rotor
Support the caliper with a hook or wire
Never let the caliper hang by the brake hose. This can damage the hose and cause brake failure.
Step 4: Remove Old Brake Pads and Hardware
Slide out the old brake pads and any retaining clips or shims.
Note how the pads are positioned
Inspect pad wear for uneven patterns
Remove old hardware if new clips are provided
Uneven wear may indicate sticking slide pins or caliper issues.
Step 5: Compress the Caliper Piston Correctly
Before installing new pads, the caliper piston must be pushed back.
Use a caliper piston tool or C clamp
Compress slowly and evenly
Watch the brake fluid reservoir level
If fluid rises too high, remove a small amount to prevent overflow.
Step 6: Install New Brake Pads and Apply Brake Grease
Install the new brake pads in the same position as the old ones.
Apply brake grease:
On pad backing plates
On slide pins if applicable
Never on the pad friction surface or rotor
Proper lubrication helps prevent squealing and uneven wear.
Step 7: Reinstall Caliper and Torque Bolts Properly
Place the caliper back over the new pads and rotor.
Reinstall caliper bolts
Tighten bolts using a torque wrench
Follow manufacturer torque specifications
Incorrect torque can cause loose brakes or damaged threads.
Step 8: Refit the Wheel and Lower the Vehicle
Reinstall the wheel and hand tighten the lug nuts.
Lower the car carefully
Torque lug nuts in a star pattern
Double check all fasteners
Before driving, pump the brake pedal until it feels firm.
Special Cases You Need to Know
Not all brake jobs are the same. At Caroto Repair Dubai, many brake issues we see come from special systems that DIY guides often skip. Knowing these cases upfront can save you time, money, and serious safety risks.
Rear Brake Pads and Electronic Parking Brakes
Rear brake pads are not always a simple swap.
Many modern cars use electronic parking brakes (EPB), which require:
A scan tool to release service mode
Correct retraction procedure for the rear caliper piston
Trying to force the piston back without service mode can damage the caliper motor. If your dashboard shows an electronic parking brake symbol, workshop service is usually the safer option. We handle EPB systems daily and reset them correctly after installation.
Brake Pad Wear Sensors
Some vehicles are equipped with brake pad wear sensors that trigger a warning light when pads are low.
Important points to know:
Sensors may need replacement with new pads
Reusing damaged sensors can keep the warning light on
Sensor reset may be required after installation
Ignoring wear sensors can lead to false alerts or missed warnings. We always check sensor conditions during brake inspections.
When Rotors Must Be Replaced with Pads
Brake pads cannot fix every braking issue. Rotors should be replaced if you notice:
Deep grooves or scoring
Excessive vibration during braking
Rotor thickness below manufacturer minimum
According to general automotive safety guidance from the NHTSA, worn or damaged rotors reduce braking efficiency and increase stopping distance. Installing new pads on bad rotors often leads to noise and poor performance.
After Installation, What to Do Before Driving
You are almost done, but this part is critical. At Caroto Repair Dubai, we often see drivers panic because the brake pedal feels soft right after changing pads. This is normal if you have not completed the final safety steps. Skipping them can be dangerous. Here is exactly what to do before you drive.
Pumping the Brake Pedal
Before starting the engine, sit in the driver’s seat and pump the brake pedal slowly.
Why this matters:
Repositions the caliper pistons against the new pads
Restores normal pedal height and firmness
Prevents a sudden lack of braking on first drive
Pump the pedal until it feels firm. If it stays soft or sinks to the floor, stop and recheck the installation. We always perform this step during brake service before any test drive.
Bedding In New Brake Pads
New brake pads need to be bedded in so they work properly and quietly. General bedding steps include:
Drive at moderate speed in a safe area
Apply gentle, controlled braking several times
Allow brakes to cool between stops
Bedding creates an even transfer layer between pads and rotors, which improves braking performance and reduces squeal. Most manufacturers recommend following their specific bedding procedure for best results.
Common Mistakes When Changing Brake Pads
Even when the steps look simple, small mistakes can cause big problems. At Caroto Repair Dubai, many brake complaints we inspect come from DIY pad changes where one detail was missed. Knowing these common errors helps you fix issues early and avoid unsafe driving.
Brake Squeal, Grinding, or Vibration After Replacement
If you hear noise or feel vibration after changing brake pads, it usually means something was overlooked. Common causes include:
No brake grease on pad backing plates or slide pins
Old or missing hardware clips
Pads installed on worn or uneven rotors
Skipping proper bedding in
Squealing is often a warning, not normal behavior. Grinding or vibration should be checked immediately to prevent rotor damage.
Uneven Pad Wear and Pulling to One Side
If the car pulls left or right while braking, or pads wear unevenly, there may be a mechanical issue. Typical reasons are:
Sticking caliper slide pins
Seized caliper piston
Uneven rotor surface
Incorrect pad installation
Uneven wear reduces braking efficiency and shortens pad life. We always inspect calipers and slide pins during brake service to ensure smooth, even braking.
Signs Your Car Needs More Than Just Brake Pads
Sometimes brake pads are not the real problem. At Caroto Repair Dubai, we often inspect cars where new pads were installed recently, yet braking issues remain. This usually means another brake component is failing. Knowing these warning signs can save you from repeat repairs and unsafe driving.
Caliper Issues
Brake calipers play a critical role by pressing the pads evenly against the rotor. When calipers fail, new pads will not perform correctly. Common signs of caliper problems include:
Uneven brake pad wear on one side
Car pulling left or right while braking
Constant brake drag or overheating wheels
Burning smell after short drives
A stuck or leaking caliper can quickly destroy new brake pads and rotors. In Dubai heat, seized calipers are more common due to dust, moisture, and lack of lubrication. We always check caliper movement and slide pins during brake inspections to prevent premature wear.
Brake Fluid or Hydraulic Problems
Brake pads rely on a healthy hydraulic system to work properly. If there is a fluid issue, pad replacement alone will not fix braking performance.
Watch out for:
Spongy or sinking brake pedal
Brake warning light on the dashboard
Visible fluid leaks near wheels or under the car
Brake fluid that looks dark or contaminated
According to general automotive safety guidance from the NHTSA, brake fluid absorbs moisture over time, which reduces braking efficiency and increases stopping distance. We recommend regular brake fluid checks and replacement as part of complete brake service.
Final Advice: Change Brake Pads Safely and Confidently
Changing brake pads can be a smart DIY task when you follow the right steps, use proper tools, and respect safety checks. This guide showed you when DIY is safe, what tools matter, how to avoid common mistakes, and when brake pads are not the real issue. At Caroto Repair Dubai, we believe confidence comes from clarity. That is why we always test first, explain clearly, and recommend only what your car actually needs.
If anything feels unclear, if your car has electronic parking brakes, wear sensors, vibration, or warning lights, professional inspection is the safer move. We handle brake inspections, pad and rotor replacement, caliper checks, and brake fluid service every day, with Dubai driving conditions in mind.
For deeper help on Brake Repair and Replacement Services in Dubai contact us to book a brake check today. Your safety always comes first, and our team is here to help.
Frequently Asked Questions
Question: How long does it take to change brake pads?
For most standard vehicles, changing brake pads takes 45 to 90 minutes. DIY jobs may take longer if it is your first time. Workshop service can be faster because tools, lift access, and experience reduce delays, especially if inspection or testing is needed.
Question: Can I change brake pads without changing rotors?
Yes, if the rotors are in good condition. Rotors must be smooth, within minimum thickness, and free from deep grooves or vibration. If rotors are warped, scored, or below spec, replacing pads alone can cause noise, poor braking, and uneven wear.
Question: Is it safe to drive immediately after replacement?
You should not drive immediately at full speed. First:
Pump the brake pedal until it feels firm
Perform gentle test braking at low speed
Follow proper bedding in procedure
This ensures safe braking and prevents sudden pedal loss.
Question: How much does brake pad replacement cost in Dubai?
In Dubai, brake pad replacement typically costs:
DIY: AED 150–350 for pads only
Workshop service: AED 350–800 depending on car type, pad quality, and inspection needs
Luxury cars or electronic parking brakes may cost more due to system complexity.